Friday, December 16, 2011

retro.

As promised, here is a real entry. Its a bit retro(active) since I made this on Sunday and ate it for dinner at work Monday, Tuesday, and Wednesday. It's also a totally retro, old-time beef stew kinda recipe. Complete with cast iron skillet and all!

My favorite part of this recipe, silly as it may sound, is that I really made it for one. The recipe made three servings- three true servings- not four or six but I gorged myself on larger servings or froze half. This is something that can be really hard to do. When I cook something for one, too much work for one night's dinner is frustrating but more than three nights means I get sick of the dish (unless it's pizza). Three is my magic number and since I work three days a week, three servings of something I know will reheat well sets me up for a great dinner at work.

I've never made beef stew, so did a quick browse of a bunch of recipes and went from there. I used 3/4 lb of lean stew beef (the other half of the package I made beef barley soup with last week), and just defrosted it in the fridge overnight. I loaded my stew with veggies for bulk without too many calories. The aroma of slow-cooking goodness coming from my cast iron pot made my little city studio feel like down home country cabin. I know it looks like a lot of ingredients, not most of this you should have around the kitchen as it's a lot of spices and such. Now, enough with the chatter, here's the recipe.

Retro Beef Stew
(for 1 + 2 days leftovers... or for 3)

2 T EVOO
12 oz lean stew beef 
1 small yellow onion, chopped
pinch of dried thyme 
pinch of dried rosemary 
small pinch of red pepper flakes
sprinkle of allspice
1 bay leaf
1 clove garlic 
1 T Worcestershire sauce
2 T tomato paste
3 cups water
4 red potatoes, quarters
3 cups water 
2 ribs celery, chopped
2 carrots, sliced
1 green pepper, chopped
1/2 cup frozen peas
salt and pepper

1. Heat EVOO in cast iron skillet and brown beef. Season beef with sale and pepper.


2. Add onion, garlic, thyme, rosemary, red pepper flakes, allspice, and bay leaves. Saute for a 1 minute. Add water, Worscestershire, and tomato paste. Season black pepper to taste (if you use salt, remember that the Worcestershire adds sodium too). Simmer with top on pot for about an hour and a half.


 3. After simmering the beef, it should be fragrant and the beef should be very tender. (Stew beef is lean so unless it's slow cooked, it will be tough).  A significant amount of water will have been reduced.


3. Add potatoes,  celery, carrots, green peppers, and mushrooms. Add more water if necessary, but the stew should be pretty thick.


4. Return lid to pot and simmer another 45 minutes, or until all veggies are tender.


5. Add peas and cook uncovered just until peas are defrosted (this will retain the bright green color). If you are making the recipe to reheat, just add frozen peas and remove from stove.


6. Season with more salt and pepper if needed. Serve with a salad and crust bread. Or, in my case, at work with an apple and pretzels. (working night shift will totally destroy your eating habits).


Mmm... wintry comfort food goodness without totally breaking the calorie bank. You could also make this in a slow cooker, but that is one of those appliances I have omitted for the sake of space saving. There's very little work involved in this dish. Simmering low and slow is the name of the game for high flavor  reward here.

Oh, and if you are new to cast iron like me, this is a great dish to use to help season your cast iron. More on that in another entry though!

Thursday, December 15, 2011

shopped.

I had all intentions of writing an entry tonight, but some red wine and Beauty and the Beast is calling my name. I promise to write before I even leave the apartment tomorrow! Beef stew and rigatoni all'Amatriciana (ahem, pasta with bacon) are the entries to come, but for now I am going to enjoy some new CB2 purchases. They have some really great modern pieces that are cool without being too funky and within my price range. Cool for cheap, perfect for a twenty something. Off to enjoy my stainless steel coasters, white appetizer plates, and wine glasses. Snacks and wine now, post to come in the AM. 


Cheers!

Monday, December 12, 2011

simple math

Not a lot of time to write, but this week's pre-work dinner didn't take long to make so it's a perfect match. 

Take Super Simple Pizza Dough + Basic Marinara + Fresh Mozzarella + Grated Parmesan to make a great pizza. Half of the dough recipe makes once pizza, and with 4 oz of mozz and 1 oz of finely grated parm you can eat 1/4 of the pizza for under 350 calories. Sweet!

1/2 for the freezer, 1/2 for diner

The dough was just about as easy as I remember, though I did use a little extra warm water and a bit more muscle to work in all of that flour. Overall, though, still the best dough recipe I've ever used. Just don't do as I do- I forgot the salt and it made a big difference. Salt = flavor.

Some rolled out, free-form dough action...


I have had mixed results using fresh mozzarella, but the trick to use this rich ingredient without making little lakes of mozzarella juice on the pie is to gently press the slices of cheese with some paper towels to remove excess liquid. Problem solved!


Layer your pie and bake at 500 degrees for about 10 -15 minutes on an oiled baking sheet or a pizza stone. The pan or stone should be heated with the oven. Crust will start to crisp and the cheese will bubble.


Served with a simple salad, you can have a dinner at 400 calories without sacrificing flavor or turning to fake ingredients- this has olive oil, fresh parm, and whole milk mozzarella- "full fat" doesn't mean its bad for you, it just means use wisely. 

Note: Both the pizza dough and marinara can be made in large batches and frozen. Defrost while you go to work, and you can have dinner when you get home even faster than ordering out! Making it for one? The toaster oven makes leftovers delicious.

Thursday, December 8, 2011

get saucy

The weather is finally  getting cold, which meant today made for a great cold weather gear run with Jill. When I got back I was super hungry and in the mood for something warm and substantial. Luckily, I made a small pot of marinara sauce over the weekend as I so patiently caramelized those onions.

I am a total pasta lover, so making my own marinara is one of those things I do fairly often, but I never feel like its quite right. Tasty, but somethings off. Well, I think I figured out my issue... patience. That's the theme of the week. Great sauce doesn't take special ingredients or some magic formula It takes simmering AKA time. This marinara is the best I've made in recent memory. This makes only about a quart, so double, triple, etc as needed. Definitely worth it to make a big amount and freeze for later use on pasta, as bolognese sauce, or in any other preparation.

Here we go.

Basic Marinara 
(about 1 quart)

1/4 cup EVOO 
small onion, finely chopped 
1-2 garlic cloves, finely chopped
2 carrots, finely chopped 
2 celery stalks, finely chopped 
1 32-oz can crushed tomatoes 
1 14-oz can diced tomatoes 
1 dried bay leaf 
salt (about 1/4 tsp) 
pepper (about 1/4 tsp)
rind of Parmesan cheese (optional)

1. Heat olive oil in a pot over medium heat. Add onions and garlic to pot and saute for about 10 minutes. The onions should be translucent. 


2. Add celery, carrots, salt, and pepper. Saute another 10 minutes or until veggies are soft. You could also add a dash of hot pepper flakes here. Note: Use a food processor to chop the veggies if you don't want chunks in your sauce. 


3. Add both cans of tomatoes. If you don't like chunks in your sauce, simply omit the diced tomatoes. If you like a thinner sauce I suppose you could try water or canned tomato sauce to thin it out.


4. Add bay leaf and Parmesan cheese rind and simmer for at least an hour. The sauce will thicken. If it seems to be thickening too much, leave the top on the pot with a crack for steam to escape from.  The rind can be removed at any time. It will add a subtle nuttiness to the sauce but is by no means necessary. It's a great thing to use that leftover rind for though!


5. Serve over pasta, freeze, add to sautéed ground beef for meat sauce, or on pizza. 


This is a thick marinara with very concentrated flavor. It was great tossed with pasta, spinach, and chicken sausage tonight for dinner and if all goes according to plan, it will top a pizza this weekend. We will see! When breaking the sauce out of the fridge, you can always use a little pasta water to thin it out (use the pasta water for the starch).

Off to work in a few, then its the weekend! On deck tomorrow? A bar tending class- because who doesn't need to know how to mix a good drink?

Sunday, December 4, 2011

drunken chicken

I had a pretty lazy Sunday but I did manage to make a really great Sunday supper- even if it was just for me. Wow that makes it sound a little depressing, but I didn't mean it to sound that way. I actually had a really nice time zoning into my own world to make this.

The recipe is admittedly not of my own creation. The flavors are ones I play with a lot- lemon, tomatoes, capers- but the actual recipe is from Giada De Laurentis's cookbook Giada's Kitchen.  I made a few changes, most notably I substituted chicken for the pork chops Giada used and seasoned the chicken with smoked paprika which added a different flavor element. I also accidentally DOUBLED the white wine from 1/2 cup to 1 cup, so I just gave it more time to simmer and cook off.  I mean, I like cooking with wine, but that extra 4 oz would have been better off in a glass- no need to liquor up the chicken!

The result is a comfort dish that is actually much brighter and lighter than it appears. You can thank the  tomatoes, lemons, and fennel for that... fennel and lemon always make a tasty duo. Never cooked with fennel? Raw, the flavor is heavily licorice but when cooked the fennel is sweet and mild with just a nice hint of licorice. This is a good dish to make if you have no fennel experience.

Chicken with Fennel and Caper Sauce
(serves 4-6)
modified from Giada De Laurentis's Pork Chops with Fennel and Caper Sauce

1 1/2 - 2 lbs chicken breasts
1/4 cup olive oil 
3/4 tsp salt (plus more for chicken)
3/4 tsp black pepper (plus more for chicken)
pinch smoked paprika or other favorite herb
2 bulbs fennel , sliced (Note: remove fronds, core, and stalks!)
3 shallots, thinly sliced
2/3 cups parsley leaves,  chopped
1 can of diced tomatoes, 28 oz 
1 lemon, zested 
3 tablespoons capers, drained

1. Season chicken with salt, pepper, and smoked paprika (or other herb of choice).


2. Heat oil in large skillet. Once oil is hot, add chicken and cook  4-5 minutes per side, or until browned.


3. Remove chicken and set aside on a plate covered lightly with foil. Note: the foil does serve a purpose- it seals in the moisture.
4. To same skillet, add fennel, 1/3 cup of parsley, and shallots. Cook about 5 minutes, or until the fennel and shallots are starting to brown. 


5. Add white wine and loosen any stuck on bits of flavor from the bottom of the skillet using a wooden spoon. Note: The wooden spoon wont ruin the pan! Add diced tomatoes and juices. 


6. Add chicken back to simmering sauce and submerge. Cook another 15 to 20 minutes, or until chicken is cooked completely and fennel is soft. 


7. Once chicken is cooked, add capers, salt, pepper, remaining 1/3 cup of parsley, and lemon zest to pan and stir. Simmer another five minutes and serve. 

I served this over quinoa, but it would be great over pasta, alongside roasted potatoes, or simply with some crusty bread to top up the juices. 

This dish was a real winner- lots of flavor and only one pot dirtied- my kind of dinner. 

And for dessert? Stove-popped popcorn with truffle oil, salt, and pepper. So chic.


Saturday, December 3, 2011

developments

I know I promised my recipe for beef barley soup but honestly, after the day I had it just seems so... uninspired. Seriously. Google a recipe for beef barley soup and it probably won't be that different, so why waste the entry?

This morning I finally made it to the open house at the Institute of Culinary Education (ICE) down in Chelsea (and appropriately on the same block as Eataly). If every college opened like ICE, they'd have no issue getting students to pay up. As I walked in the door I was greeted by friendly staff and a few people serving beverages- a mimosa while I learn about school? Don't mind if I do.

The room had about 100 people in it for the open house and the presenters that followed were dynamic and kept those creative wheels spinning in my brain. I couldn't stop imagining what doors could be opened if I really got serious about my culinary endeavors. In between the speakers, we were treated to two cooking demos- one culinary, one pastry. The cooking one was what caught my attention (no surprise there), with an apple and butternut squash soup garnished with spiced pepitas, pumpernickel croutons, and duck confit. Talk about delicious. There were so many different flavors that every bite seemed to have just a slightly different taste. It was a perfect example of how expertise, creativity, and patience can take any dish and elevate it to a completely new level. This silly little soup had me completely captivated as I thought of what I  could do to transform my everyday meals.

After the demos (the second was a perfectly sweet salted caramel eclair), we toured the kitchens and I spoke with a few faculty members. One in particular, the director or culinary management, was extremely interested and encouraging. We talked about my interests and the direction I may want to go with my culinary dreams which is food media. He was a wealth of information and as we talked about finding my voice I felt so encouraged to just explore. He didn't try to sell me the diploma program but instead directed me to some of his colleagues in the food industry that he thought may be willing to provide guidance. By not selling the school, I began to really see ICE as a place for passion, which cannot be sold.

I know I am sounding like a total dreamer, but as Ive said, it was an inspiring experience and the push I needed to figure out what exactly it is I should do next with my culinary hobby.

Sorry for all the talk! The good news? I made a much more inspired dish than some throw together soup!

Caramelized Onion Pizza


I've made this before, but never on the blog and never with such careful detail. I decided to really focus on developing flavors in this dish, as with the butternut squash soup, and decided not to skip the little details.

For dough, I defrosted the whole wheat pizza dough I made a few weeks ago in the fridge overnight. Once defrosted, I put it in a bowl right next to the preheating oven while I composed the rest of the pizza.

The most important component was the caramelized onions...

1-2 T EVOO
1 T unsalted butter 
2 onions
pinch dried rosemary 
pinch dried thyme 
pinch dried red peppers
sea salt 
cracked black pepper
1 T balsamic vinegar
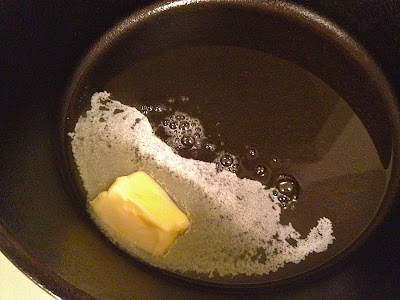
1. Heat large skillet (mine is cast iron) on low-medium heat. Add olive oil and butter to pan. Allow butter to melt into oil.
Note: You need the butter for great flavor in the caramelized onions and the EVOO to raise the smoke point.  
2. Turn heat to low. Add sliced onions, red pepper flakes, thyme, rosemary, salt, and pepper to taste. Be gentle with the spices but more liberal with the salt and pepper.
Notes:  If you use salted butter, remember to adjust your salting of the dish. The red pepper flakes will intensify immensely as you slow cook for an hour- use appropriately.  

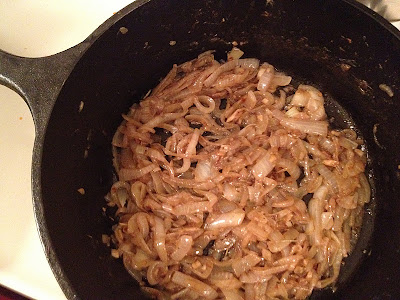
3. Be patient. The onions will take an hour or more to fully reduce and caramelize. Keep the heat low, you do not want to brown the onions, you want them to sweat and slowly change color. Slow means sweeter onions and deeper flavor development from the spices. 
4. After 45 minutes to an hour, add 1 T balsamic vinegar to onions. Continue to cook onions at least for 15 more minutes.  Note: The  balsamic adds sweetness and depth. Another option for the pizza is to make a separate balsamic reduction. I've done this and it is a pretty special addition- it also takes more time, which I decided to skip tonight.

5. After the balsamic vinegar is fully incorporated and reduced, about 15 minutes, taste onions. They should be very soft and almost "melt" in your mouth. The balsamic vinegar should not be immediately identified. Keep cooking if the flavor is too acid. 
The onions should top your pizza crust first. Then it's time for component number two... fresh herbs. 
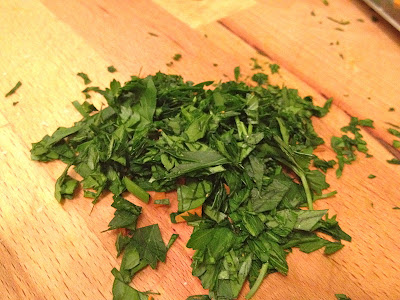
For freshness I used a few tablespoons of fresh Italian parsley, which I had on hand, but basil or a mix of  a few fresh herbs would be tasty too.  

What's pizza without the cheese? I've made this pizza with a variety of cheeses but the main thing with it is.... don't use just one cheese and no fresh mozzarella! I used a combination of sharp cheddar and Parmesan prior to the oven and then a crumble of goat cheese as soon as the hot pie came out of the oven. Why these three? Because I had about an ounce of cheddar, three ounces of parm, and three ounces of goat cheese leftover. (Hey- I may be into cooking but I am still a 23 year old making my $$ work for me!) Other cheeses that would be good? Smoked mozzarella, fontina, or gouda... just not all together because they'd be too creamy. I suggest mixing a creamy and hard cheese (parm or asiago).  Whatever you use though, please grate it yourself. The flavor of block cheeses doesn't compare to pre-shredded.
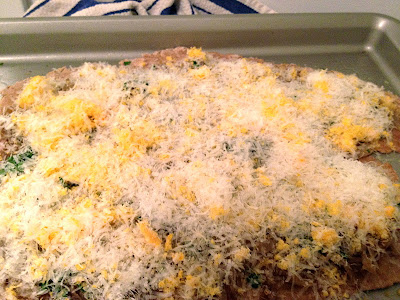
Notes: I used very little cheese by grating it with a Microplane grater/zester. The only caveat here is that the cheese melts very fast, so next time I would cook the crust first if I used such a thin cheese layer.

Bake the pie at 500 degrees on a lightly oiled baking sheet for about 10 minutes, or until the cheese melts (see note above) and the crust is crispy. Use your hand to flatten out the dough or a rolling pin... the defrosted dough can be a bit more difficult to manipulate so I used the pin for assistance. If you use a pizza stone, which means you are luckier than I, preheat it with your oven for at least a half hour and use cornmeal on the stone instead of oil.


Do I really need to say serve hot and bubbly?

I promise the time taken on the onions is worth it. Time and patience cannot be substituted for great flavor. Make it for guests as an appetizer, for your family dinner, or for your single self (ahem... like me...). Why only make something especially delicious when you have to share? Hello leftovers!

The time and care taken for this simple pizza only solidified the passion that stirred in me today, which hopefully showed in this entry. Stay with me as I embark on the next step in my culinary journey.


I got a five miler in just before dark... thank goodness because I couldn't stop until I ate 1/3 of the pizza! Happy trails :)

Friday, December 2, 2011

diner days

Happy late Thanksgiving! Last week was busy with family and lots of relaxing fun, but I have to say I'm happy to be back in my apartment and into my schedule. Its time to hunker down in the new place for awhile.

First thing I did when I got back? Christmas tree and lights in the windows! I love Christmas and couldn't wait to decorate... even though my tree is teeny tiny it makes my apartment so festive. It's my first tree of my own and this little guy already  has special place in my heart.


As for the post-turkey detox, I've been doing my best to eat healthy despite the fact that warm, wintry comfort is calling my name. As a compromise I've been making meals with warm, hearty vegetables like sweet potatoes and brussels sprouts and finishing them with goat cheese or Parmesan- warm, filling, and laced with cheese these have been filling me up without sabotaging the healthy eating initiative. High heat, a tiny bit of EVOO, garlic, salt, and pepper are all that's needed. I also throw in some fresh cranberries for an interesting tang. Its not mac and cheese as far as the comfort factor, but it does the trick sans guilt.


 roasted sweet potatoes, brussels sprouts, and cranberries with Parmesan
I did have to give into a serious pasta craving but kept it to one serving. Spinach, garlic, truffle oil, salt, and pepper topped with parm. So simple, but the white truffle oil really elevates the simple dish to something a little more special.


The third in the comfort trifecta? A healthy rendition of burger and fries. Sandwich thin "bun" with a Morningstar tomato and basil veggie burger (cooked on my cast-iron grill pan for sweet grill marks and some grill char) topped with a thin layer of goat cheese and arugula. Sweet potato oven "fries" and some veggie sticks on the side. Filling and totally satisfying- for under 400 calories. This can't be beat.


I kept everything simple cooking wise this week because my habit of making two main meals and eating them all week was getting old. I am getting desperate for variety. I did make one "big" dish though- Beef Barley Soup. That recipe will come tomorrow (I swear). It was simple and I totally winged it - which is why soup making is the best- but it came out pretty good for a simple soup. 

The other recipe I winged with less success. I attempted to modify my Pumpkin Cranberry Muffins but went a bit crazy. 

Problem #1: I only had enough multigrain mix for 1/2 a recipe. 
Problem #2: I tried to cut back the sugar and nearly eliminate the oil all in one recipe (if you are a scientist you get me- too many variables being manipulated). 
Problem #3: The dish I used was too small so it took forever to cook the center. 

not all was lost though...

Success #1: It looks great.
Success #2: I used up a lot of those darn fresh cranberries I can't seem to finish.
Success #3: It's not inedible. But I refuse to serve it to anyone besides myself. Thank god for the freezer.


I love the artsy picture and was impressed by the overall look, but the uneven cooking and my stinginess on sugar mean I won't be serving this to anyone I like. But, with some nut butter or jam, it'll do for my breakfasts. 

Had a delicious lunch at FoodParc today with Annaliese... yay! We got to catch up over a shared salad, burger, and fries. FoodParc is an upscale, modern food court in the Flatiron District that I read about and wanted to try. It has a cool lounge-y feel and the food was good. The salad from Edible Greens of seared tuna, pickled ginger, wasabi peas, avocado, crispy shallots, radishes, and miso dressing was tasty and creative, but it's the burger I'd go back for.  The 3B's Special Burger burger- juicy beef with American cheese, special sauce, crispy onions, lettuce, tomato, and pickles- was one of the tastiest I've had in awhile. 


Off to make some sort of salad for dinner to out balance that burger and an injured foot that called for a rest day from running. Then out it's out for the night, but not too late because I'm heading to an open house for the Institute of Culinary Education in the morning! My curiosity about culinary school has gotten the best of me. It can't hurt to look, right?

Tuesday, November 22, 2011

happy feet

Had a great weekend full of activity which was just what my body needed after lot of weekends of "too much" fun.

Saturday, Jill, Norah, and I headed out to Brooklyn for the Rugged Maniac 5K. Nerves were getting the better of us so we chose to drink our free Harpoon ale before the race- great call.  Decked out in some compression wear and my Vibram KSOs, I was ready to dirty. We expected to get mud covered, but apparently mud wasn't an option due to cold I think? Any who after climbing over walls and police barricades, crawling through tunnels, running up and down hills, and plenty of other obstacles we hit FOUR trash dumpsters full of WATER! We scrambled up the side of the dumpster and into waist deep, frigid water. As we hit the water we had to swim under barricades, so not soaking your whole body was not an option. We proceeded to scramble in and out of the dumpsters using ladders, planks, or just our bodies. Once we all got out we ran to the finish (after climbing up a tower and jumping about 8 feet down) and crossed as a team. Such a fun race! Even though it was a bit brutal to defrost after.


Bruised, battered, and sore  Sunday was no rest for the weary- I headed to the final 5K for GOTR. I was so happy to go because I have really missed coaching nice moving into the city. The race was all GOTR and their families (up to 1300 runners expected!) and it was the first final 5K where the race wasn't linked with another community event. VERY cool. Lots of purple shirts and just a really great environment to run in. Crossed the finish line with one girl then I ran back to see if any of my other girls needed encouragement- and ended up crossing with two more. Such a great group of girls- everyone did their best and was as proud of themselves as I was of each of them.

Still working with that runners high I had all weekend and ran 5 yesterday followed by about 4 today in the cold, pouring rain. Happy feet syndrome has hit... now if I can keep it going til that 15K!

Have to head to work so I can't post a recipe as I'd hoped, but I'll post a picture to keep your appetite curious...

Friday, November 18, 2011

little pumpkin


I know I said I'd post a muffin recipe yesterday, but life got in the way. Only a day late though, which is better than I can say for the past few months!

Yesterday I woke up and motivated myself to run which was great because after my 6 miler the day before I finally hit my running groove. I set out to do about 4, but on my way back I bumped into a nurse that started working when I did a year ago (but on a different unit) and invited myself to run with her. Four miles turned into nearly six PLUS I made a new running buddy. Yay!

Then it was off to dinner at Lillie's Victorian with my college roommate Laura then met up for drinks with Liz before heading back here for a sleepover with Laura. Fun Thursday- and just thirsty enough.

Today I woke up at noon- even though I had arms set for both nine and ten. Fail. Tried to make the best of it though because I usually be at myself up for sleeping in. I actually resisted the urge to run and just did some neighborhood exploration with power walking between destinations. My only shopping damage was my first pair of Lululemon pants (they were on sale!) which I am excited to wear to the GOTR 5K on Sunday. With two races this weekend, a rest day seemed like a good idea even though I caught the running bug and just want to get back out there.

Since I slept in, today I ate a decent sized "brunch" which included TWO of the Pumpkin Cranberry Muffins I made earlier this week. I took a short cut by using a TJ's baking mix- which includes some whole wheat flour, rolled oats, cornmeal, and other whole grains- but you could use any flour of your choice, just add baking soda and a pinch of salt to make sure you get a good rise and flavor.

Here's the recipe... make a little fall love.


Pumpkin Cranberry Muffins 
(makes about 2 dozen)

2 1/2 cups Trader Joe's Multigrain Pancake and baking mix 
(or some combination of 2 1/2 cups flour PLUS baking soda)


1 cup skim milk 
1 egg 
2 TBSP canola oil 
1/2 cup sugar
1 cup canned pumpkin puree 
1 cup fresh whole cranberries 
1 tsp cinnamon 
1/2 tsp ground ginger 
1/4 tsp allspice (or ground cloves)
1/2 tsp ground nutmeg


1) Preheat oven to 350 degrees. Spray muffin tins, place muffin liners, or use silicone baking cups (which I used). 
2) Mix egg, milk, sugar, and oil in bowl. Slowly add baking mix. 
3) Once flour or baking mix is incorporated, add pumpkin and spices. Continue to mix, just until pumpkin is incorporated. 
4) Fold cranberries into batter. 
5) Fill cups to about 3/4 full with batter. Makes 22-24 muffins. 
6) Bake 25-30 minutes or until toothpick comes out clean. 
7) Serve or freeze! Tastes great with apple butter, nut butter, or other topping of your choice! 


Note: Applesauce could easily replace oil and some sugar in this recipe. I will work on that substitution next time, but as a novice baker I didn't get involved in that this time!
Another note: Silicone baking cups are so easy to use and eliminate the need for any extra oil. They wash out so easily PLUS these were only $2 from HomeGoods. Should have bought the second dozen!


Now, as much as I dislike baking, I had a good time developing this recipe and an even better time enjoying it! I even felt confident enough to bring some to work- and they were even more well-received than I expected. The muffins are very moist (due to the pumpkin) and fairly sweet. You could definitely cut back on the sugar or oil in favor of applesauce. The spices add a pumpkin pie flavor while the cranberries add some tangy freshness. I froze half the recipe and have been heating them in the toaster oven then topping them with apple butter. For someone who prefers salty over sweet any day, I have been tearing through the bag rather quickly! But, for 100 calories a pop, there are worse habits!


Got back nice and early from drinks with girls from work and now I am off to bed to prepare for the Rugged Maniac 5K tomorrow! Running/Fire/Mud/Music/Beer.... what more could a girl ask for? Pretty sure I will be a mud popsicle by the end but I am nonetheless super excited!